tie dye patterns and how to do them
Learn how to tie dye patterns by doing. For creating 6-8 wedge shapes crisscross the bands.

17 Tie Dye Patterns And Folding Techniques Sarah Maker
165 DIY Tie Dye Shirts Patterns with Instructions.

. Tie them at various intervals depending on how close you want the stripes. Accordion fold the fabric from the bottom up. Lets jazz up a plain t-shirt and create super cool patterns.
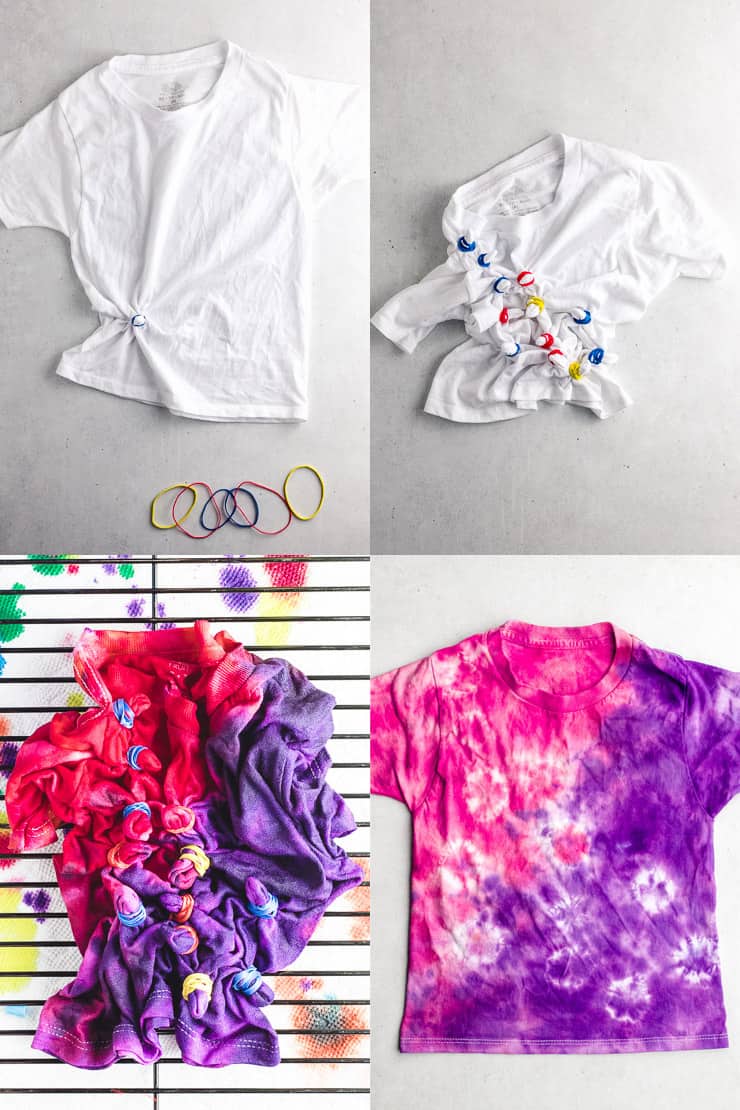
Pick the dots together and at the base of the circles tie them up with strings. Prepare your supplies and work area. White space no dye is okay.
7These patterns work better if you use just one colour of dye and are often used in Shibori indigo dying learn how to make a shibori tie dye scarf here on Gathered. 10This is a very basic tie and dye technique for creating uneven textured patterns on fabric. Tie-Dye is one of the most popular and fun ways to re-create a plain t-shirt.
Im going to start off showing you how to do a spiral pattern because thats the most dramatic and fun pattern to make. 19Accordion Folded Stripe Pattern Tie Dye Technique Lay the fabric flat. 19Simple tie dye techniques and patterns.
Fold and tie the shirt according to the pattern. First wet the shirt and lay it flat. Afterward fold in half horizontally.
The spider web one is worked in the same manner. Using this method of tying youll create a design with your design that corkscrews out from the middle point of your spiralStep 2 Spread your material out on a flat surface. But before you do make sure the surface is clean.
The spiral pattern is a classic tie dye look. Wet then wring out a cotton shirt. The dye and ice cubes get scattered all over whatever you are tie dyeing.
Tie Dye the Perfect V Shape on a T-Shirt. - First lay your shirt out flat. Flip the fabric over and repeat on the backside.
You will get vertical stripes on the tube. This method involves gathering and scrunching the fabric as a tube andor into a small round and tying it using a binding thread. Firstly fold in the sleeves of your t-shirt then fold the whole t-shirt lengthways into a long strip.
As there is no wrong way in tie-dyeing do experiments as you wish. Add rubber bands around the shirt layering them diagonally to create a pie-like pattern. 14The method for working this pattern is pretty simple involving working on a regular round tie-dyed shirt in black and orange before drawing eyes nose and mouth on the round orange marks to create smiling Jack-o-lanterns.
Wrapping the fabric tightly will produce more white areas that the dye cant. Merge the layers then rename. At this point you will have a long strip of fabric.
Patterns are created because the dye of the immersed item does not reach the parts of the fabric that are bunched together. This is easiest done by reading our complete guide to tie-dyeing. Youll follow the same instructions as you would for the triangle pattern except youll accordion fold your shirt into squares and put cardboard squares at.
Microwave on a high setting for about 1 minute. Secure the fabric with four rubber bands evenly spaced as shown above. Tie Dye Design for DIY Shirt.
Make sure the line appears straight on the top of the pleats. 5Crumple the shirt into a ball and wrap the entire ball with six to 10 rubber bandsenough so that it holds its shape. To make great tie dye you need to know a little Color Theory and what happens when separate Tie Dye Colors are dyed together.
Apply the dye to the fabric. Wrap very well to the tip. Dyes flow after applied to fabric.
Now that your layers are merged you can rename the layer. 29Tie-dye is undeniably one of summers hottest trends and its so easy to DIY. Wrap the t-shirt in a piece of cling film and place it on a microwavable plate.
Tie and dye as you usually do. Choose your favorite pattern. Use the patterns on this page by first learning the basic process.
The number of dyes is dependent on the number of wedges present in your fabric. 23Use 3-4 rubber bands to wrap and secure the fabric. First prep your shirt with water or soda ash as directed in the dye instructions.
Use your squeeze bottle. With your fingers scrunch and wrinkle the. Now choose the colors of your choice and create this pattern.
4Leave to sit for about five minutes. Halloween Tie Dye Shirt. Then start folding the fabric along the line you made with the marker.
Since the ice cubes melt at different rates you dont know what the end product is. 4Step 1 Make a basic spiral. How to use tie-dye patterns.
21Once you have these two layers ready select both the copy of the tie-dye layer and the Black White Adjustment Layer leaving the bottom tie-dye layer out. Separate dye colors change color when they flow together. Fold the t-shirt from the middle make plates and tie it with thread.
Fold the fabric in half. 18Tie-dye your t-shirts or other fabrics using rubber bands. The Tie Dye shirt uses mild shades.
Next use a washable marker to draw a line from the center of the left side. 25No matter what patterns you are going to make the basics of tie dye remain the same. Spiral - Lay the item out flat pinch the centre of the fabric or pin with a fork and then do a twisting motion in one direction and it.
Right-click and select Merge Layers. As the ice cubes melt they drip down into the shirt carrying the dye with them into the fabric. It should also be a little damp when you fold it and add the dyes.
Remove the t-shirt from the dye solution and wring out any of the excess dye. The basic spiral collects all your fabric together into a single coil. You can fold the fabric into pleats and then tie and then dye.
When you tie-dye fabrics you become your own designer by making an original piece of art. Rubber bands bunch or shape the material in various ways to make patterns once the bands are removed. You can create this.
15To create a diamond tie-dye pattern lay your tie-dye fabric on the table and fold it in half vertically. You will then create the design for your shirt by folding and tying it. Your shirt should be washed to remove any sizing if its brand new.
Mix the dyes in the special dye bottles. 24Even very young kids can help make this cosmic tie-dye design. 27Finally cut pieces of cardboard into triangles to cap each side and secure tightly with bands or string.
To make stripes you must roll the garment loosely and get it together like a tube.

17 Tie Dye Patterns And Folding Techniques Sarah Maker

How To Tie Dye 101
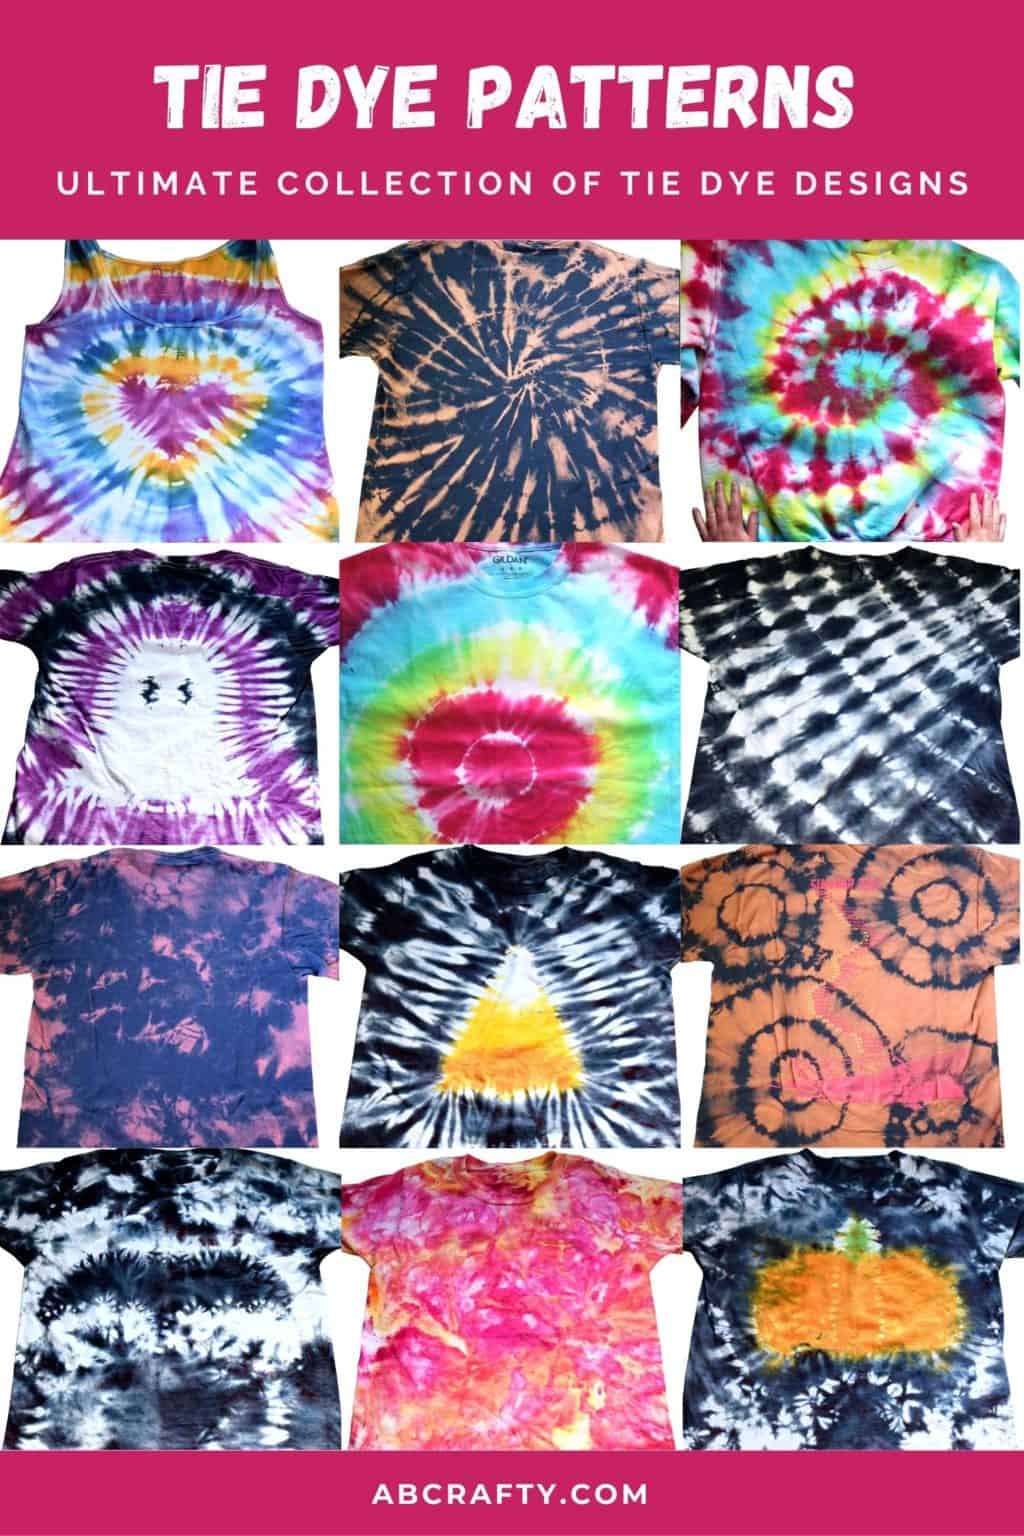
Tie Dye Patterns 17 Unique Tie Dye Designs Ab Crafty
17 Tie Dye Patterns And Folding Techniques Sarah Maker
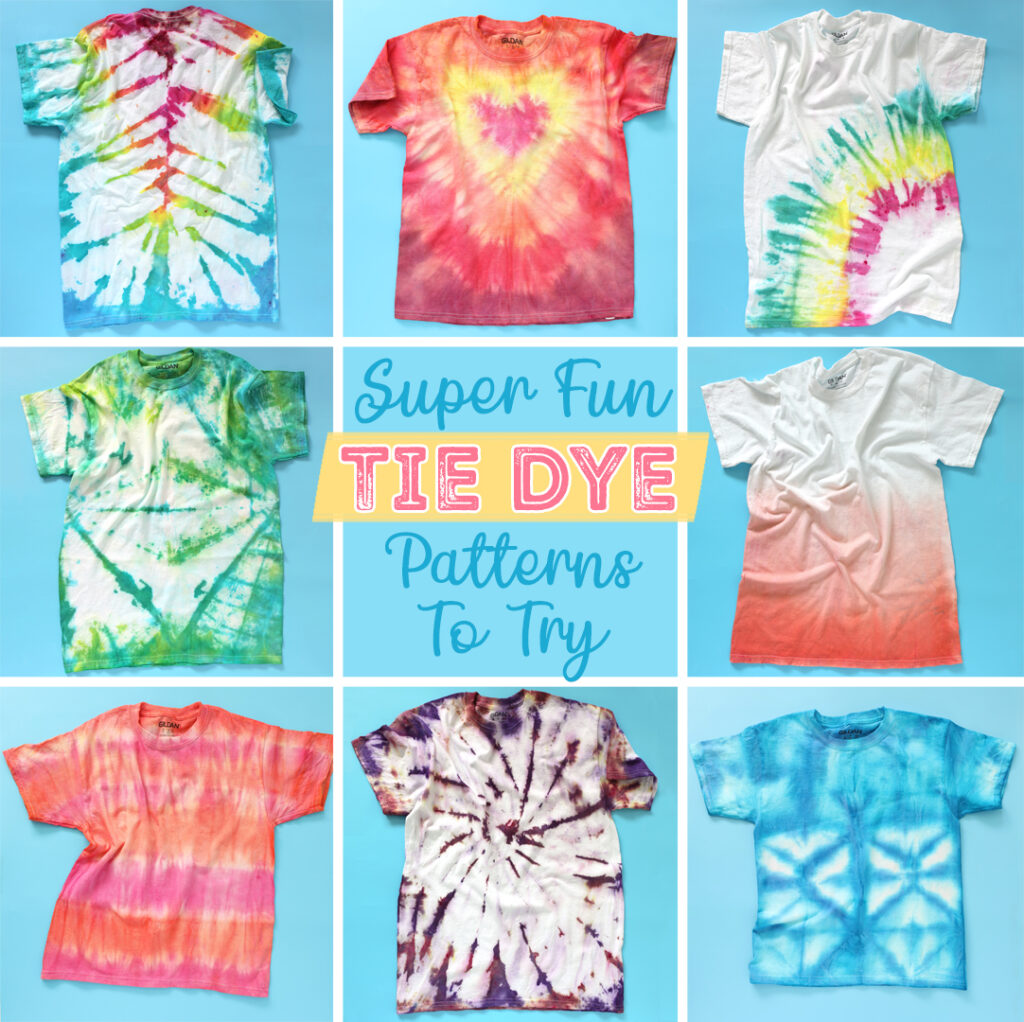
Cool Tie Dye Patterns To Try

17 Tie Dye Patterns And Folding Techniques Sarah Maker
30 Tie Dye Designs W Step By Step Patterns Kids Activities Blog

100 Tie Dye Patterns And Ideas
How To Tie Dye For Beginners